
Zero-to-Fullstack: Building a Modern Web Application from Square One
Part I: The Development Environment


Hello, world!
As part of my introduction to Substack, I wanted to write a series of articles on the state of building modern fullstack web applications in 2025. I want to do this not because any of the ideas herein are particularly novel, but because there aren’t many modern zero-to-fullstack application educational resources that I’ve seen. Over the course of this series, we’ll be building a quiz app called quizzem complete with: a database, API, and web and mobile user interfaces.
My current plan is to have the series be comprised of four parts. Parts one and two will cover the backend APIs and data, while parts three and four will focus on the application’s user interfaces. Specifically, these are the planned subjects we’ll cover over the course of this series:
Part I: The development environment
Part II: The data model
Part III: The API
Part IV: Admin web UI
Part V: Player mobile UI
Currently productionalization and deployment are beyond the planned score of this series, but depending on my enthusiasm for the project by the end of Part IV, I may add follow up posts.
What we’re building
The demo project I’ve chosen to create for this series is a simple trivia application. It’s an application for trivia hosts and players alike, allowing hosts to build and launch quizzes that players can join to play along. The web UI will serve as an administration portal, through which trivia hosts manage quizzes they’ve created. The mobile UI application we’ll be building will allow players and teams to join games created by trivia hosts. We’ll explore further specifics of the application’s functionality and requirements as we proceed through the series.
The source code for this article can be found in its Github repository.
Prerequisites
In order to follow along, you’ll need to make sure you have two pieces of software installed in your local development environment:
A current version of Node.js. Node.js is a cross-platform Javascript runtime used for executing code in non-browser environments, such as Windows, MacOS, and Linux. This is the runtime that we’ll use to scaffold (and later run) the applications we’re building and to execute automated scripts. As of the time of writing (July 2025), v22 is LTS and v24 is current, either of which should work for purposes of this series.
Container virtualization software. This is the software that will execute the majority of our application’s workloads, including: the database and API. I prefer Podman, but Docker is probably the most popular containerization solution available today. For our purposes, the two should be cross-compatible so feel free to work with the one you feel most called to use.
If you’re missing either of these components, they can be downloaded for free from their respective websites linked above.
Zero to Hello, World!
Once Node.js is installed in your local environment, you’re ready to create the API application. Most web server frameworks are differentiated by how strongly convention dictates development patterns and processes. On one end of the spectrum are lightweight frameworks such as Flask and Express, which are unopinionated and highly flexible making them good candidates for simple use cases. On the other end are highly opinionated frameworks, such as Springboot or Ruby on Rails, which depend on strong systems of conventionality to perform magic. I’ve worked with many frameworks and languages over my career, but I’ve selected the Nest.js framework for this series because I’ve found it strikes reasonable compromises among opinionality, flexibility, robustness, and documentation.
We will begin by letting the framework scaffold the application for us by executing1:
> npx @nestjs/cli newYou’ll be asked which package manager you’d like to use—in this case I selected npm—as well as a name for the project. The CLI tool will create the project directory and a set of project files. After a few moments the project’s dependencies should be installed with the following output printed to the console:
🚀  Successfully created project quizzem
👉  Get started with the following commands:

$ cd quizzem
$ npm run start
Follow the output’s instructions by navigating into your project’s newly created directory and execute npm start. Open a browser and type in http://localhost:3000 to see Hello World! and confirm the application is running. When you’re ready, terminate the application and open the source code in your IDE.
Dockerizing Hello, World!
Congratulations on launching a barebones API application. Our next objective is to containerize the application. There are a number of reasons why this is an important step in the process, but perhaps most poignantly it will simplify running the application alongside other services when we incorporate it into a service mesh.
Create two new files in the project’s root directory called Dockerfile.dev and .dockerignore.2 The Dockerfile.dev file will define instructions for creating our API application’s container image and the .dockerignore file will exclude any unnecessary build files from copying into our image builds. In the .dockerignore file add the following lines:
node_modules
dist
postgres-data
Including these directories can unnecessarily bloat your images and slow your builds considerably depending on the size of the data. As a rule of thumb, avoid including any files in images that are created during your application’s build process. In the Dockerfile.dev file, include the following lines:
FROM node:22-alpine

ENV NODE_ENV development
ENV PORT=8080

WORKDIR /usr/src/app

COPY package*.json ./

RUN npm ci

COPY  . .

EXPOSE ${PORT}

CMD npm run start:dev
The instructions here are straight-forward.
We begin by defining the base image. This is the image we’re building on top of, which most importantly comes pre-packaged with a pre-defined version of Node.
We define a set of environment variables.
We define the image’s working directory. This is the directory files will copy into and commands will execute from.
The package.json and package-lock.json are copied from the project directory into the image’s working directory.
Dependencies are installed according to the package manifest copied in the previous step.
The remainder of the source files are copied into the image’s working directory.3
The network port the container will listen on at runtime is defined.
The application’s entrypoint command is defined.
To build the instructions defined in Dockerfile.dev, execute the following command:
podman build -f Dockerfile.dev -t api:latestor, if you’re using Docker:
docker build -f Dockerfile.dev -t api:latestYou should see output corresponding to the steps outlined above. Once the build is complete, launch the image by executing:
podman run -p 8080:8080 api:latest or, if using Docker:
docker run -p 8080:8080 api:latestThe application should start and can be accessed from the browser at the updated host http://localhost:8080.
Service Orchestration
Our application backend is planned to be relatively straight-forward, consisting of only two separate services: an API and a database. However, it should be readily apparent that as application sophistication grows, so to do the complexities of networking, service discovery, and integrating and managing dependent services. Service orchestrators like Podman and Docker help solve these problems by managing service-to-service communication and orchestrating the creation of dependent services.
The first service we’ll add to the orchestrator is the API application we just containerized. Create a new file, calling it docker-compose.yaml. Add the following lines to it.
services:
  api:
    build:
      dockerfile: Dockerfile.dev
      context: .
    environment:
      - NODE_ENV=development
      - PORT=8080
    volumes:
      - .:/usr/src/app
      - ./node_modules:/usr/src/app/node_modules
    command: npm run start:debug
    ports:
      - 8080:8080
Once the contents have been added to docker-compose.yaml, run:
podman compose upor if running via Docker:
docker compose upAs we saw in the previous phase, the application should build, run, and be accessible at http://localhost:8080 after running the compose up command. Try changing Hello World! in app.service.ts to Hello World from inside a container!. If the web application doesn’t automatically restart and show the updated text, there’s likely a problem with typescript and you should add the following lines to your tsconfig.json’s root object to fix it:
  ...
  "watchOptions": {
    "watchFile": "fixedPollingInterval"
  }
  ...
Next, we’re going to introduce a postgres database service to our orchestrator. This is accomplished in a few simple lines thanks to Podman/Docker compose. Append the following bolded lines to the existing docker-compose.yaml. When it’s done, it should look like the following:
services:
  api:
    build:
      dockerfile: Dockerfile.dev
      context: .
    environment:
      - NODE_ENV=development
      - PORT=8080
    volumes:
      - .:/usr/src/app
      - ./node_modules:/usr/src/app/node_modules
    command: npm run start:debug
    ports:
      - 8080:8080
    depends_on:
      - db
  db:
    image: postgis/postgis:15-3.3
    restart: always
    environment:
      - POSTGRES_DB=quizzem
      - POSTGRES_PASSWORD=postgres
      - POSTGRES_USER=postgres
    ports:
      - '5432:5432'
    volumes:
      - ./postgres-data:/var/lib/postgresql/data
The important elements here are: the base image (in this case I used a PostGIS base image because I work a fair bit with geospatial queries), volumes, which are persistent data stores for containers allowing our database’s data to persist across container restarts, and the environment variables which define the username, password, and the database that will be created when the database container is started. The depends_on key that was added to the api service tells the orchestrator to not start the api service until after the database service is up and running. Now, rerun the command:
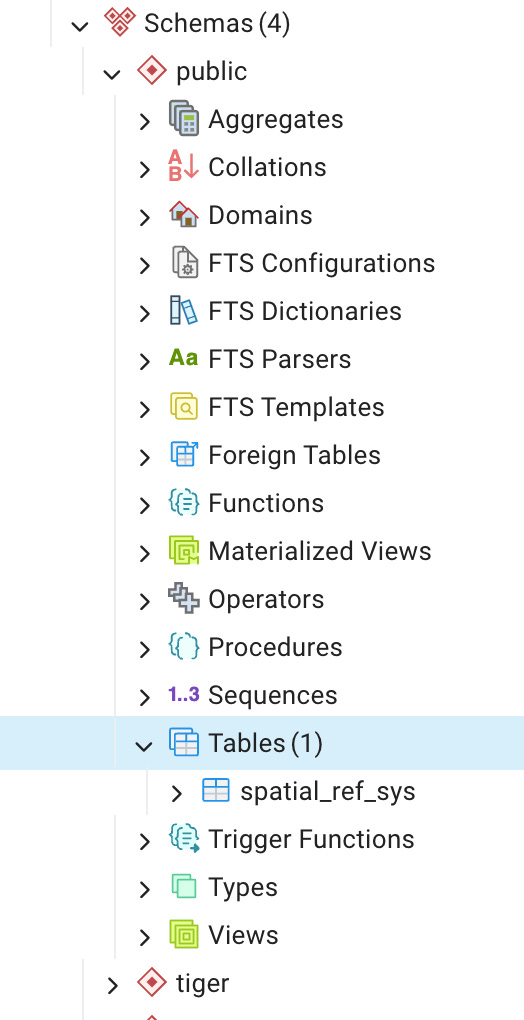
podman compose upto see the database and the API application both started. Try connecting to postgres (address: localhost:5432 using the auth credentials defined in the compose file) via pgAdmin or psql to confirm it’s up and accepting connections.
Connecting Database and API Services
Presently the database and API services are running side-by-side but are not yet connected. To connect the two services, we’re going to create a Nest.js module that’s responsible for managing the connection between our database and API services. To do that, we’re going to leverage TypeORM, an object-relational mapping library with first-class support for Typescript to mediate between our API application’s data model and the underlying relational data. Execute the following commands to install the dependencies and to scaffold the new persistence module:
npm install --save @nestjs/typeorm pg typeorm
npx nest g module persistence
Reading the resulting output, you should see a new file created at src/persistence/persistence.module. Open this file and add the following bolded lines to it:
import { Module } from '@nestjs/common';
import { TypeOrmModule } from '@nestjs/typeorm';

@Module({
  imports: [
    TypeOrmModule.forRoot({
      database: 'quizzem',
      entities: [],
      host: 'db',
      logger: 'advanced-console',
      maxQueryExecutionTime: 100,
      password: 'postgres',
      port: 5432,
      synchronize: false,
      type: 'postgres',
      username: 'postgres',
    }),
  ],
})
export class PersistenceModule {}
When the application restarts, there shouldn’t be any errors suggesting the API service has successfully connected to the database service.
At this point, however, if we inspect the content of the database we’ll learn that it’s empty (with the possible exception of some system-level resources). In the next section, we’ll learn how to automate migrating the database to store and retrieve our application’s data.
Defining our First Domain Object
Unlike NoSQL databases, relational databases require a schema to define how data are related, stored and subsequently retrieved. We’ll define that schema using the so-called code-first patter, where the database schema is generated from code rather than the other way around. We’ll begin by creating a resource—an abstraction for data that can be created, accessed, updated, and deleted—in Nest.js using Nest’s CRUD Generator. The first resource we’ll create is a Question, which will be a core domain object moving forward in our application. Create the resource by running:
npx nest g res questionsWhen prompted for the transport layer you’d like to use select REST API and when asked if you would like to generate CRUD entry points choose Yes. This will scaffold a new module, controller, service, DTOs, and entity on your behalf. For this article we’re only going to focus on the entity and module, but we’ll explore the other file types in the next article. Notice how when the application restarts, the following logs appear in the console:
...LOG [InstanceLoader] QuestionsModule dependencies initialized +0ms
...LOG [RoutesResolver] QuestionsController {/questions}:
...LOG [RouterExplorer] Mapped {/questions, POST} route
...
Nest created the resource, injected the service and controller thereby adding it to the application for us!
If we open src/questions/entities/question.entity.ts we’ll see a simple class declaration. Let’s begin by extending the class so it contains a simplified model of the attributes we’ll need for our application:
export class Question {
  id: number;

  text: string;
}
Extend the class and each of its properties with decorators from the TypeORM library to declare this class as an object entity that maps to relational data in the database.
import { Column, Entity, PrimaryGeneratedColumn } from 'typeorm';

@Entity('questions')
export class Question {
  @PrimaryGeneratedColumn()
  id: number;

  @Column()
  text: string;
}
Specifically, these decorators tell TypeORM that this class maps directly to a table in our database called questions having the attributes (i.e. columns) id of dtype int and text of dtype text. Notice how the dtypes of the underlying data are inferred from the Typescript types, meaning your schemas and code should always remain consistent.
Next, open src/questions/questions.module.ts and add the bolded lines to it:
import { Module } from '@nestjs/common';
import { TypeOrmModule } from '@nestjs/typeorm';

import { Question } from './entities/question.entity';
import { QuestionsController } from './questions.controller';
import { QuestionsService } from './questions.service';

@Module({
  controllers: [QuestionsController],
  imports: [TypeOrmModule.forFeature([Question])],
  providers: [QuestionsService],
})
export class QuestionsModule {}
The TypeOrmModule will later allow us to inject data repositories into our services to perform operations on our application’s data. Finally, add the Question entity to the entities list in src/persistence/persistence.module.ts.
import { Module } from '@nestjs/common';
import { TypeOrmModule } from '@nestjs/typeorm';

import { Question } from '../questions/entities/question.entity';

@Module({
  imports: [
    TypeOrmModule.forRoot({
      database: 'quizzem',
      entities: [Question],
      host: 'db',
      logger: 'advanced-console',
      maxQueryExecutionTime: 100,
      password: 'postgres',
      port: 5432,
      synchronize: false,
      type: 'postgres',
      username: 'postgres',
    }),
  ],
})
export class PersistenceModule {}
Migrating the Database
We’ve defined our first domain object, but if we inspect the database we’ll see the table to hold that data still does not exist. To do so, we’ll need to first define how the database should create these objects and then execute a command to create the database objects, a process known as database migration (i.e. migrating it from one state to the next).
We’ll begin by adding the following bolded lines to our scripts object in the project’s package.json:
  ...
  "scripts": {
    "build": "nest build",
    "db:drop": "ts-node ./node_modules/typeorm/cli.js schema:drop --dataSource orm-config.ts",
    "db:migrate": "ts-node ./node_modules/typeorm/cli.js migration:run --dataSource orm-config.ts",
    "db:migrate:down": "ts-node ./node_modules/typeorm/cli.js migration:revert --dataSource orm-config.ts",
    "db:migration:generate": "ts-node ./node_modules/typeorm/cli.js migration:generate ./priv/migrations/migrations --dataSource orm-config.ts --pretty",
    "format": "prettier --write \"src/**/*.ts\" \"test/**/*.ts\"",
    "start": "nest start",
    "start:dev": "nest start --watch",
    "start:debug:container": "nest start  --debug --watch",
    "start:debug": "nest start -e \"node --inspect-brk=0.0.0.0:9229\" --debug --watch",
    "start:prod": "node dist/main",
    "lint": "eslint \"{src,apps,libs,test}/**/*.ts\" --fix",
    "test": "jest",
    "test:watch": "jest --watch",
    "test:cov": "jest --coverage",
    "test:debug": "node --inspect-brk -r tsconfig-paths/register -r ts-node/register node_modules/.bin/jest --runInBand",
    "test:e2e": "jest --config ./test/jest-e2e.json"
  },
  ...
These scripts each correspond to a common command we’ll be executing on our database. For example, executing npm run db:drop will drop the application database, while executing npm run db:migrate will migrate the database, executing any new migration files. Before we execute any of these commands, we first need to create an orm-config.ts file in our project’s root directory. Add the following lines to your orm-config.ts file:
import { DataSource } from 'typeorm';
import { PostgresConnectionOptions } from 'typeorm/driver/postgres/PostgresConnectionOptions';

const config: PostgresConnectionOptions = {
  database: 'quizzem',
  entities: [`${__dirname}/src/*/entities/*.entity.{js,ts}`],
  host: 'localhost',
  migrations: [`${__dirname}/priv/migrations/*.{js,ts}`],
  password: 'postgres',
  port: 5432,
  synchronize: false,
  type: 'postgres',
  username: 'postgres',
  logging: true,
  logger: 'advanced-console',
  ssl: false,
};

export default new DataSource(config);
A few things are notable here. The first is that we’re executing these commands locally and not inside a container, so the host is different from the config defined in src/persistence/persistence.module.ts. Second, we define a migrations attribute which tells TypeORM where our migration files are stored in our directory hierarchy.
The first command we’ll execute is npm run db:migration:generate. This command will look at the entities defined in our source code, compare them against the existing state of the database, and generate a migration file defining how the database should migrate to its new state. Once executed, you should see some generated SQL log to the console and that a new migration file was generated in priv/migrations.4 If we open that newly created file we should see a class with two methods: up and down. Each of these methods define how to migrate the database in one direction and should mirror one another. In other words, if Migration#up defines the creation of a table, Migration#down should define how to drop that same table and vice versa. Indeed, if we look at the generated SQL in our migration file, we see the up method defines the creation of a questions table, with columns id and text, while down contains instruction for dropping the questions table.
We can now execute the migration by running npm run db:migrate. You should see the following output:
...
0 migrations are already loaded in the database.
1 migrations were found in the source code.
1 migrations are new migrations must be executed.
Migration Migrations* has been executed successfully.
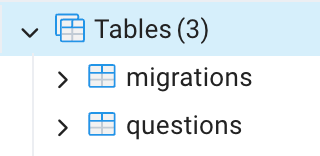
...This indicates a successful migration. Indeed, inspecting the database shows two new tables: migrations which is how the ORM tracks what has and has not yet run, and a questions table corresponding to the entity we defined in our source code.
Recap
I’m a strong believer in establishing early conventions and patterns that keep developers engaged and productive. Creating a good development experience is a big contributor to that and the most important part of that development experience is a good development environment. In this article we dove into the elements of spinning up a lightweight development environment for our quiz application. In the next part, we’ll expand the application’s data model and build out the service and controller methods for interacting with those data. Lastly, if you encountered any challenges or problems while following along here please let me know in the comments, so I can improve the article for future readers (and possible provide some light debugging assistance).
npx comes bundled with npm (Node’s official package manager), allowing users to execute arbitrary commands from npm packages, even if they’re not directly installed on users’ machines. In this case, npx downloads the @nestjs/cli package from npm, if it’s not installed already and executes the new command.
Both files are compatible with Podman and Docker, so if you’re following along with Podman, please create and name the files as described.
The reason we copy over source files after installing the dependencies is because source files change more frequently than dependency manifests. Most image building tools cache image layers. If the package-lock and package.json don’t change, then we can use cached image layers, thereby speeding up build times significantly. In fact, if you execute podman build -f Dockerfile.dev again, without changing anything, you should see the build is significantly faster, because it’s using cached image layers!
Migrations are a powerful tool for creating predictable, reproducible, and testable environments. Unless you know what you’re doing, migration files should never be altered or deleted once executed. They should also be committed to your source code repository